Washes & Techniques
How to Paint a Flat Wash in Watercolor, Step by Step
Learn how to paint a flat wash in watercolor with this beginner-friendly step-by-step guide to even color, the right mix, and a tilted board.
A flat wash is the most fundamental watercolor technique you will ever learn. Get it right and every sky, background, and shadow you paint from here on out will be stronger. It means painting a rectangle of color that is perfectly even from top to bottom, with no streaks, blotches, or tide marks. Here is exactly how to do it.
What you need before you start
Rushing into a wash without the right setup is the most common reason beginners get streaky results. Spend two minutes on this and the wash almost paints itself.
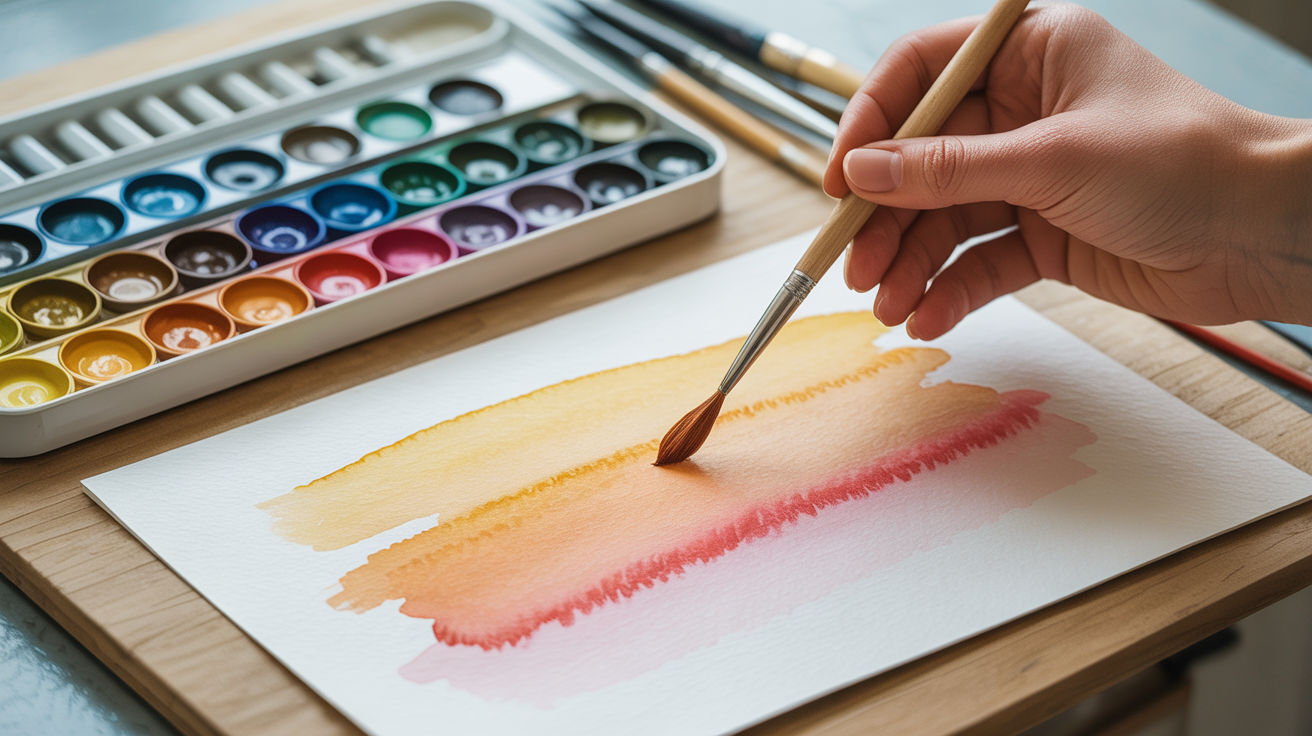
Paper. Use 140 lb (300 gsm) cold-press watercolor paper. Lighter paper buckles when wet and the puddles pool in the dips, which makes an even wash nearly impossible. Tape a sheet to a board with painter's tape along all four edges.
Board angle. Tilt your board at roughly 10 to 15 degrees. You can prop one end on a book or a small box. This tilt lets gravity carry a small bead of paint downward in a controlled way. Flat boards lead to backruns; steep boards make the wash race too fast.
Two water jars. Use one jar to rinse your brush and a second clean jar for mixing. Dirty rinse water muddies your colors immediately.
Brush. A size 10 round brush or a 1-inch flat wash brush both work well. The key is a brush that holds enough paint to complete a single stroke across the paper without running dry mid-stroke.
A pre-mixed puddle. This is non-negotiable. Mix more paint than you think you need before you touch the paper. A small puddle runs out halfway across the second stroke and forces you to stop and remix, which almost always leaves a hard line.
How to mix the right consistency
Watercolor washes are all about water-to-paint ratio. For a flat wash, you want a "tea" consistency: the water should be clearly tinted but not as pale as a rinse. Drop in pigment and stir until the color reads clearly in the well of your palette.
A few practical checks:
- Dip your brush and hold it over the palette. The paint should flow off in a steady drip, not run off instantly (too wet) or cling in a thick blob (too dry).
- Test a stroke on a scrap of the same paper. Let it dry. Watercolor dries 20 to 30% lighter than it looks wet, so your test patch is your best preview.
- Mix at least twice the volume you think you need for the area you are covering. Running out mid-wash is far worse than having leftover paint.
Granulating pigments like ultramarine or burnt sienna will settle slightly as you work, so give the puddle a quick stir every minute or two. Transparent pigments like phthalo blue or quinacridone rose stay more uniform and are forgiving choices for your first few practice washes.
Step-by-step: painting the flat wash
Work steadily but without rushing. Each step sets up the next one.
-
Load your brush fully. Dip into your pre-mixed puddle until the brush is heavy with paint. You should see a slight drip forming at the tip.
-
Start at the top. Place the brush at the top-left corner of your working area and draw a horizontal stroke all the way to the right edge. Press gently so the belly of the brush touches the paper, not just the tip.
-
Pick up the bead. At the end of the stroke you will see a small bead of wet paint sitting at the bottom edge of the stroke. This is your working edge and it is your best friend. Keep it alive throughout the whole wash.
-
Return and overlap. Reload your brush, come back to the left side and start your second stroke slightly above the bead so the new stroke just touches and merges with it. The bead absorbs into the new paint and you avoid a hard line between strokes.
-
Maintain a wet bead, always. Every stroke you lay down should nudge the bead downward. If the bead disappears because paint dried too fast, you will get a streak. If you slow down, add a little extra water to your brush to keep it fluid.
-
Work steadily down the paper. Keep repeating the reload-stroke-overlap sequence until you reach the bottom of your wash area.
-
End cleanly. On your last stroke, use a drier brush (squeeze a little paint out on a paper towel first) to pick up the remaining bead at the bottom. If you leave it, it will creep back up as the paper dries and leave a tide mark.
-
Leave it alone. Put your brush down and do not touch the wash until it is completely dry. This is the hardest step. Any brush stroke into a drying wash will lift paint and create a bloom or a streak.
Once you are comfortable with this process, compare it to the graded wash technique, where you gradually add water to lighten the color from top to bottom. A flat wash keeps the color even all the way down.
Common problems and how to fix them
Every beginner hits these. None of them mean you are bad at watercolor.
| Problem | Likely cause | Fix |
|---|---|---|
| Streaky horizontal lines | Brush ran out mid-stroke | Pre-mix more paint; reload before the brush runs dry |
| Tide mark at bottom | Bead left to dry | Pick up the bead with a drier brush on the final stroke |
| Blotchy, uneven color | Board too flat | Tilt your board 10-15 degrees |
| Color bleeds into dry area | Paper not fully dry between passes | Wait longer; use a hair dryer on low if needed |
| Wash looks too pale when dry | Mixed too thin or tested on wrong paper | Test on the same paper; mix slightly darker than you want |
One thing that surprises new painters: if you are working wet-on-dry (paint on dry paper), the wash is fairly predictable. But if your paper is damp from a previous layer, all bets are off and you are in wet-on-wet territory. Read up on wet-on-wet technique before you combine the two, because they behave very differently.
Practicing on purpose
A flat wash is worth practicing on its own, without any painting goal in mind. Try these exercises on scrap paper:
- Paint the same color three times across the page with different paint-to-water ratios: "milk" (strong and opaque-looking), "tea" (mid-tone), and "water tint" (very pale). See how they dry.
- Paint a flat wash in ultramarine. Note how the granules of the pigment settle into the paper texture and give the wash a slightly textured surface. Try the same with a staining pigment like phthalo blue and notice how smooth and even it stays.
- Time yourself. A 4-inch by 6-inch flat wash should take about 60 to 90 seconds of active painting. If you are taking much longer, you are probably stopping too often and letting the bead dry between strokes.
Once you can paint a flat wash confidently, you have the foundation for almost everything else in watercolor. Many of the same principles apply when you move to wet-on-dry painting, where controlled edges and dry paper are the whole game.
Frequently asked questions
Why does my flat wash always look streaky?
Streaks almost always come from one of three things: the board is flat, the brush ran out of paint mid-stroke, or you went back to touch a stroke that was already starting to dry. Tilt your board, pre-mix a bigger puddle, and keep moving forward without going back.
Do I need to stretch my paper before doing a wash?
For small practice pieces (half a sheet or less), 140 lb (300 gsm) paper taped down on all four sides is usually fine. For larger washes on lighter paper, stretching helps prevent buckling, which causes puddles that dry unevenly. Stretching is worthwhile to learn but not essential for your first attempts.
How do I keep the wash from going back into areas that have dried?
Work in one pass from top to bottom without stopping. If you need to re-enter a dry area, let the whole wash dry completely first, then glaze a second layer over it. Glazing (adding a second transparent layer over a dry first layer) is a separate technique, but it is the clean way to deepen a color without disturbing what is beneath.
Can I use a flat brush instead of a round brush?
Yes, and many painters prefer a 1-inch flat wash brush for wide washes because it covers more ground per stroke and holds a generous amount of paint. The technique is exactly the same. Just make sure the brush is not too stiff or it will lift paint instead of laying it down smoothly.
Why does my wash look lighter than I expected when it dried?
Watercolor always dries lighter than it looks wet, typically 20 to 30% lighter. This catches nearly every beginner at least once. The fix is to test your mixed color on a scrap of the same paper and let it dry before committing to your main piece. Mixing slightly darker than you want is the right habit to build.